 Save
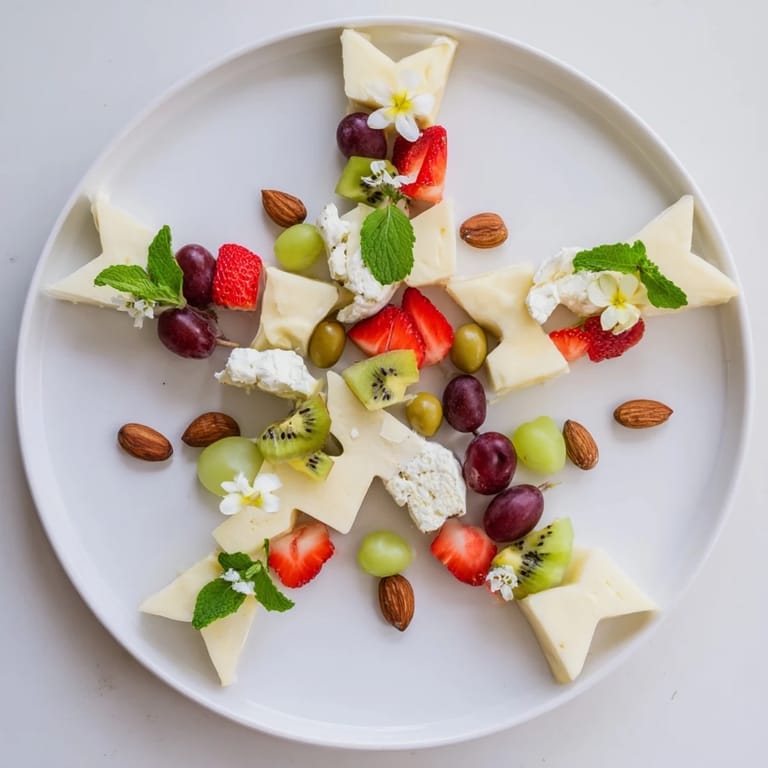
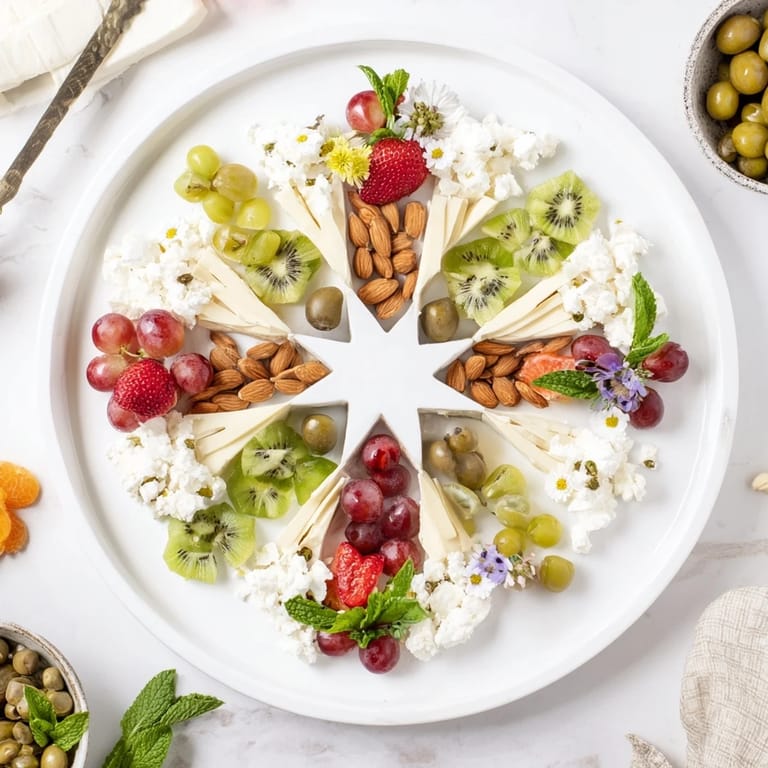
Save I still remember the moment I discovered the power of negative space in food presentation. It was at a gallery opening where a friend had arranged a stunning cheese board, and instead of just piling ingredients together, she'd created this striking star shape in the empty space between the cheeses and fruits. Guests were mesmerized before they even took a bite. That night, I realized that food could be art, and the empty space was just as important as what filled it. Now, whenever I want to impress people, I turn to this technique—The Negative Space Puzzle—where the arrangement itself becomes the main event.
I made this for my sister's engagement party, spelling out her initials in negative space with a border of vibrant berries and creamy cheeses. Watching her face when she walked into the room and saw her own letters floating in the middle of the platter—that moment made every careful minute of arranging worthwhile. It became the photo everyone wanted to post, and more importantly, it felt like the platter was celebrating her specifically.
Ingredients
- Brie cheese, sliced (100 g): This is your creamy anchor—it's soft enough to let people know this is meant to be indulgent, but structured enough to hold its shape on the board. I always slice it about a quarter-inch thick so it looks substantial without being overwhelming
- Manchego cheese, sliced (100 g): The firm texture and nutty flavor create a beautiful contrast with the Brie, and the pale golden color photographs beautifully against darker fruits
- Goat cheese, crumbled (100 g): This is your texture wild card—the crumbles catch light differently and add visual interest while providing a tangy counterpoint to sweeter elements
- Seedless red grapes (1 cup): These are your color jewels and they stay where you put them, which matters enormously when you're maintaining a precise shape
- Strawberries, halved (1 cup): Cut them just before assembling so they stay fresh and glossy—this is where your negative space really pops because the red interior glows
- Kiwi, sliced (1): The bright green and geometric pattern of kiwi slices add elegance and a pop of unexpected color that draws the eye
- Blueberries (1/2 cup): These tiny spheres are invaluable for filling small gaps and creating color depth in your design
- Thin crackers (12): Choose ones that are visually interesting—ridged or seeded varieties add dimension. They should complement but not compete with your negative space
- Roasted almonds (1/2 cup): The brown tones anchor the platter and add a satisfying crunch that guests expect from a savory board
- Green olives, pitted (1/4 cup): These provide color contrast and a briny sophistication that makes people feel like they're at something special
- Fresh mint leaves: Don't skip this—the green adds freshness and signals to guests that care went into every detail
- Edible flowers (optional): If you can find them, they transform the whole thing from impressive to absolutely enchanting
Tired of Takeout? 🥡
Get 10 meals you can make faster than delivery arrives. Seriously.
One email. No spam. Unsubscribe anytime.
Instructions
- Choose and sketch your shape:
- This is the fun part where you get to decide what story you're telling. A star works beautifully for celebrations, initials feel personal and special, a heart speaks for itself. Sketch it lightly on parchment paper and make sure it fits comfortably on your platter with room for ingredients around it. Don't make it too small—the negative space needs to breathe to have impact
- Set up your guide:
- Lay the parchment on your platter with your design facing up. You're essentially creating a stencil that will keep you honest as you arrange. Stand back frequently to check that your outline is still clear and your arrangement respects the boundary
- Begin with cheese clusters:
- Start placing your cheeses in small, intentional groupings around the outlined design. This is your foundation. Think about color placement—darker Manchego next to creamy Brie creates visual rhythm. Leave the negative space completely clear, almost aggressively empty
- Layer in your fruits strategically:
- Now fill the gaps between cheese clusters with your fruit. Halved strawberries show their ruby interiors beautifully, grapes nestle into small spaces, kiwi slices can be fanned slightly for drama. As you place each piece, you're building the color story that makes people lean in
- Add texture and crunch:
- Scatter almonds and olives in small piles throughout. These aren't just functional—they catch light and create shadow, making the whole platter feel three-dimensional. Don't distribute them evenly; let some areas feel more abundant than others
- The reveal:
- This is the moment. Carefully peel back the parchment. Your negative space should be pristine and unmistakable. If there are any small gaps in your arrangement, now is the time to adjust with a strategic blueberry or mint leaf
- Final garnish:
- Scatter mint leaves across the platter—not just in the negative space, but throughout. If you have edible flowers, position them where they'll catch someone's eye. Step back and look at it as a whole. You're creating anticipation
- The service:
- Bring this platter out with intention. Give people a moment to appreciate it before hands reach in. You've created something worth admiring, and you've earned that pause
 Save
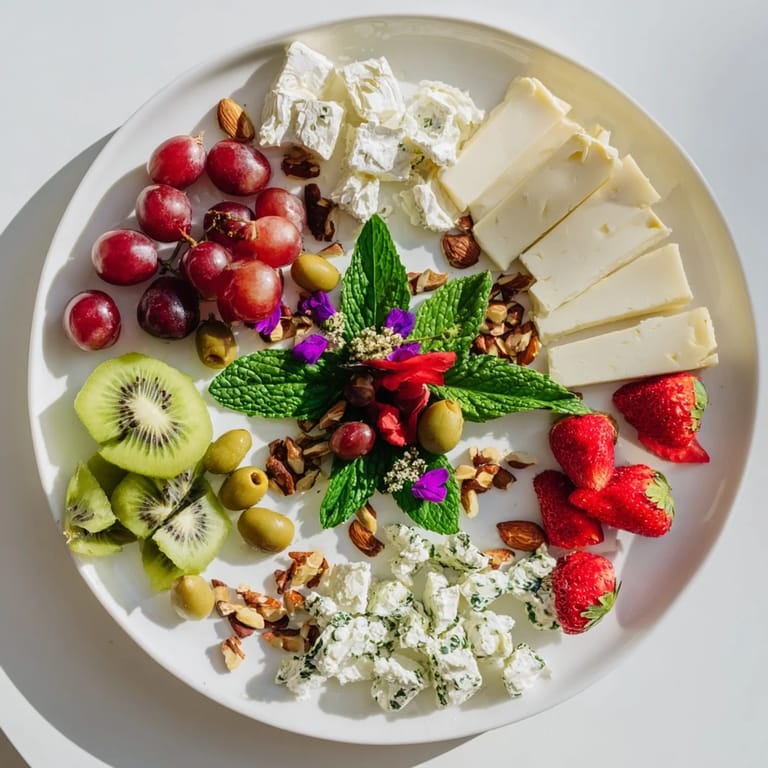
Save What surprised me most wasn't the compliments about how beautiful it looked—it was watching people eat it. They'd stand there debating which element to try first, making tiny conversations with their hands about color and flavor combinations. The negative space had done its job so well that it made people more thoughtful about their choices. Food became interactive, intentional, almost ceremonial.
Designing Your Negative Space
The shape you choose matters psychologically. Stars feel celebratory and works for almost any occasion. Initials feel intimate and personalized—I've done these for anniversaries and they became keepsakes people actually photographed. Geometric shapes like crescents or diamonds feel more formal and sophisticated. Themed shapes—a leaf for harvest celebrations, a snowflake for winter gatherings—tell a story before anyone takes a bite. The best designs have enough complexity to feel impressive but enough simplicity that you can execute it cleanly. Don't overthink it; your first instinct about what shape feels right usually is.
Variations for Different Occasions
For a dessert version, this becomes an entirely different conversation. Replace the cheeses with dark chocolate chunks and white chocolate shavings, swap crackers for biscotti or shortbread, and use dried apricots, dried figs, and candied orange slices instead of fresh fruit. The principle remains the same—the negative space becomes even more dramatic against the deeper tones. I once did this for a chocolate tasting and arranged dark and milk chocolate pieces to create the shape, creating almost a monochromatic negative space that somehow felt more sophisticated than the colorful savory version. You can also split the difference and create a mixed platter with both savory and sweet elements, using the negative space to separate them visually and conceptually.
The Magic of Intentional Arrangement
This technique teaches you something important about cooking that goes beyond recipes: presentation is a form of communication. When you take the time to create negative space, you're telling your guests that you thought about them before they arrived. You're saying their presence matters enough to be celebrated with intentionality. Every element has a reason for being there. And the beautiful part is that once you understand this principle, you'll start seeing negative space everywhere—in plating individual dishes, in how you arrange flowers, in how you think about visual balance in general. This one platter becomes a gateway to thinking differently about presentation altogether.
- Prep all ingredients the night before except for the actual assembly—washing fruit, slicing cheese, arranging in small bowls makes the final assembly flow beautifully
- Use a large platter; cramped negative space defeats the purpose and makes the shape hard to read
- Step back and look at your work from different angles, especially from above where most photos will be taken from
 Save
Save Making this platter changed how I think about cooking for people. It's not always about complicated techniques or rare ingredients—sometimes it's about seeing ordinary beautiful things and arranging them with intention and care. That's the real recipe.
Recipe FAQs
- → What is negative space in this platter?
Negative space refers to the intentionally left empty areas between clusters of ingredients, creating visible shapes like stars or letters on the serving surface.
- → Can the platter be adjusted for dietary needs?
Yes, this platter is vegetarian and can be adapted for gluten-free diets by using gluten-free crackers; swapping cheeses with chocolates also offers a dessert alternative.
- → How do I keep the negative shapes sharp and defined?
Using parchment paper as a stencil and carefully arranging items around it ensures clear, well-defined negative shapes.
- → What flavors complement this arrangement?
The combination of creamy cheeses, fresh fruits, crunchy nuts, and savory crackers provides a balanced mix of savory, sweet, and textured flavors.
- → What garnishes enhance the platter's presentation?
Fresh mint leaves and edible flowers add vibrant color and a refreshing aroma to complete the elegant look.