 Save
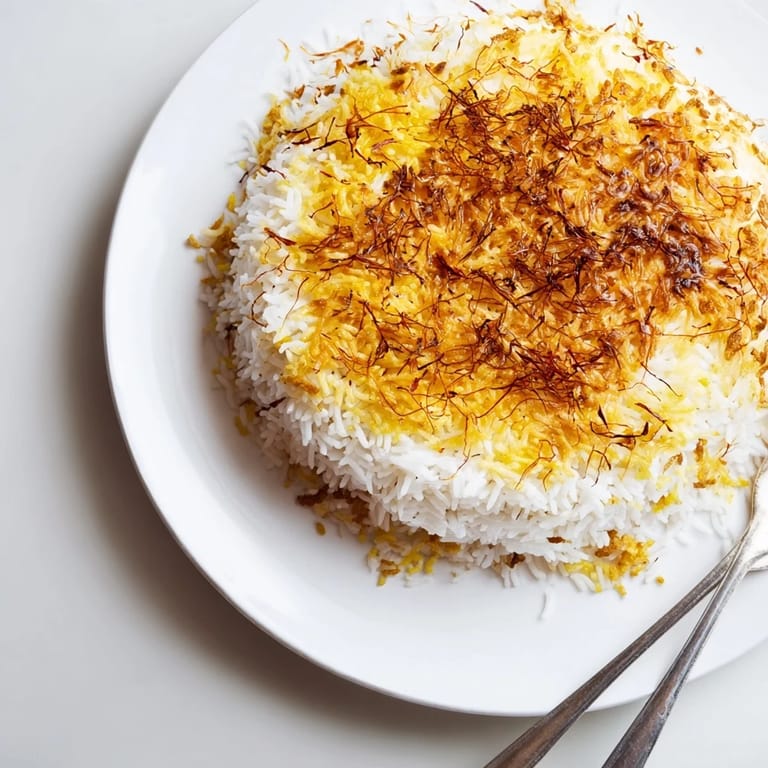
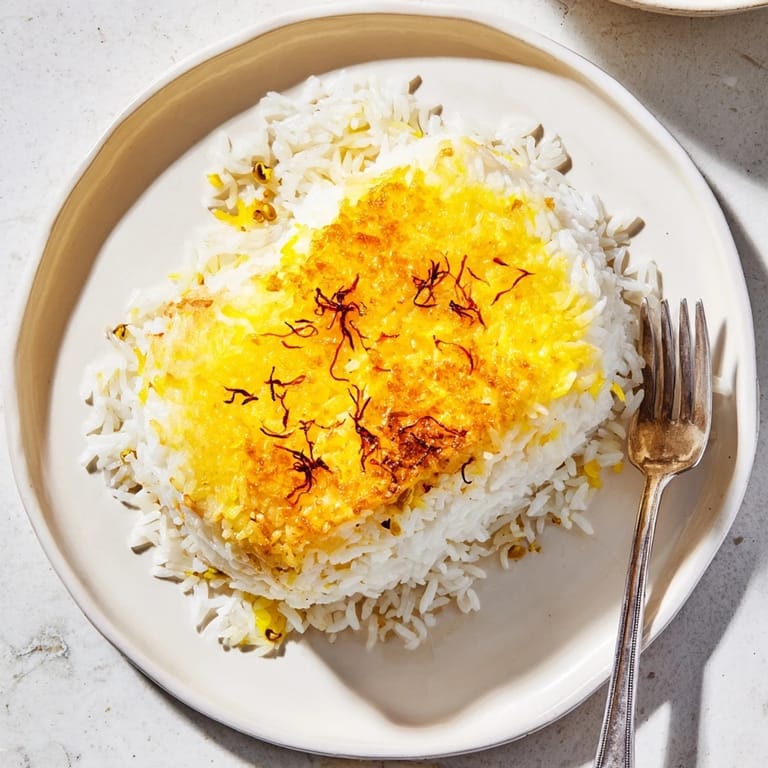
Save My first tahdig moment happened on a rainy Tuesday when my neighbor brought over a platter of this golden-crusted Persian rice, and I heard the most satisfying crackle when she broke through the caramelized bottom. I watched her carefully invert it onto the serving dish with such confidence, revealing that burnished, crispy layer underneath, and I knew right then I had to learn this. The aroma of saffron mixed with that toasted rice crust filled her kitchen in a way that no ordinary rice ever could.
I remember cooking this for my partner's family dinner, and when I carefully flipped that pot over the platter, the whole room went quiet—then everyone leaned in to see that perfect golden crust. My hands were shaking a little because I wasn't sure if it would release cleanly, but when it did, I felt this small rush of pride that came straight from my chest. That's when I understood that tahdig isn't just rice; it's a small act of care that your guests can taste and feel.
Ingredients
- Basmati rice (2 cups): This variety's slender grains stay separate and fluffy, which is exactly what tahdig needs—choose a good quality brand because it really does make a difference in texture and aroma.
- Salt (1 tablespoon for soaking): This seasons the rice deeply and helps draw out surface starches so you get that perfect tender-but-firm result.
- Saffron threads (1/4 teaspoon): The golden treasure of this dish—steep it gently in hot water to coax out its deep color and subtle floral notes.
- Plain Greek yogurt (4 tablespoons): This is the secret binding agent for your tahdig crust; the slight tanginess works beautifully with the toasted rice flavor.
- Vegetable oil and unsalted butter (2 tablespoons each): The combination of these two fats creates that ideal golden, crispy crust without burning—use a trusted nonstick pot for success.
- Ground turmeric and black pepper (1/2 teaspoon each): Optional but worth adding; the turmeric ties the whole dish together with warmth and a subtle earthy note.
Tired of Takeout? 🥡
Get 10 meals you can make faster than delivery arrives. Seriously.
One email. No spam. Unsubscribe anytime.
Instructions
- Rinse and soak your rice:
- Run the basmati under cold water and keep rinsing until the water runs clear—this removes excess starch and prevents gumminess. Soak it in salted water for at least 30 minutes so every grain absorbs seasoning evenly and the texture becomes tender rather than mushy.
- Parboil until just tender:
- Bring salted water to a rolling boil, add the drained rice, and cook for only 5 to 6 minutes—you want it still slightly firm because it will finish cooking in the pot. Drain and set aside; undercooking here is better than overcooking.
- Steep the saffron:
- Grind the threads gently with the back of a spoon, then pour hot water over them and wait 10 minutes for the color and flavor to bloom into that signature golden liquid. This step is worth the patience—those 10 minutes make all the difference.
- Make your tahdig paste:
- Mix the yogurt with 1 tablespoon of saffron water, your aromatics, and 1 cup of the parboiled rice until it forms a spreadable paste. This mixture will become the crispy, caramelized foundation when it hits the hot pan.
- Heat the pan properly:
- Combine the oil and melted butter in your heavy-bottomed pot over medium heat and let it warm for a couple of minutes until you can feel the heat radiating when you hold your hand above it. This step ensures even browning and prevents sticking.
- Spread the tahdig layer:
- Carefully spread your yogurt-rice mixture evenly across the bottom of the hot pan—this is what will eventually become that golden crust you're after. Use a spoon to create an even thickness so it cooks uniformly.
- Layer the remaining rice:
- Gently pile the rest of the rice on top, mounding it slightly toward the center, then pour the remaining saffron water over the whole thing. Poke a few holes into the rice with a wooden spoon handle to let steam escape so you don't end up with gummy rice.
- Cook low and slow:
- Start at medium heat for 10 minutes to begin forming that crust, then reduce to low and cook for 35 to 40 minutes—you might hear occasional gentle crackling, which is the tahdig forming. Wrap your lid in a clean kitchen towel before covering the pot to trap steam and create that tender, fluffy rice texture.
- Rest and release:
- Let the pot sit off heat for 5 minutes so the tahdig can release from the bottom and the rice can relax slightly. This small pause makes the difference between a crust that comes free cleanly and one that crumbles or sticks.
- The moment of truth:
- Place your serving platter upside down over the pot, hold them together firmly, and flip with confidence—a quick, smooth motion works better than hesitation. If you hear that satisfying crackle of the tahdig separating, you've done it right.
 Save
Save There's something almost meditative about listening to tahdig as it cooks quietly on the stove—those soft crackling sounds that mean the crust is forming, the smell of saffron and toasted rice building throughout your kitchen. I learned to love those quiet 40 minutes where I couldn't fiddle with it or fix it, just had to trust that my careful layering and timing would pay off.
The Science Behind the Crust
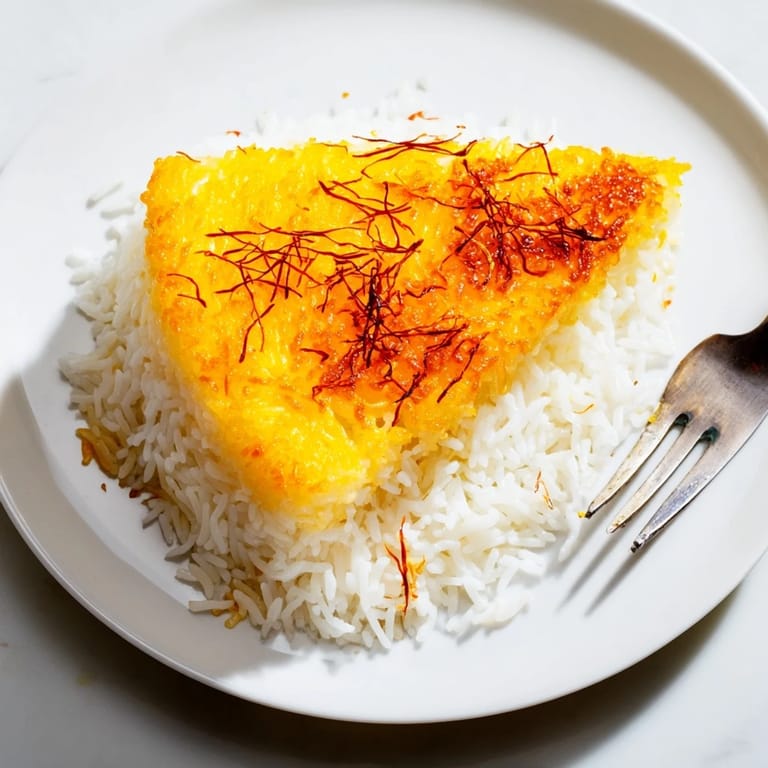
Tahdig isn't just fancy caramelization—the combination of yogurt, fat, and rice creates a crispy-yet-tender crust through both browning and steam cooking. The yogurt provides protein and acid that help create structure, while the oil and butter contribute that golden color and rich flavor. When the steam from the rice above meets the hot bottom layer, it creates the ideal environment for a crust that's crispy on the outside but still connected to the fluffy rice above.
Variations and Flavor Boosts
Once you master the basic technique, tahdig becomes a canvas for your own variations. Some cooks swap the yogurt crust for thinly sliced potatoes, which get crispy and golden just like the rice version; others use flatbread pressed into the bottom of the pan for a different textural contrast. You can add cinnamon sticks or cardamom pods to the boiling water for extra aroma, or finish with barberries, pomegranate seeds, or fresh herbs for brightness and visual pop.
Making It Your Own
The beauty of tahdig is that once you understand the fundamentals, you can personalize it to match your mood or what you're serving alongside it. I've added ground pistachios to the yogurt layer for nuttiness, incorporated fresh dill into the upper rice, and even done an all-turmeric version for a deeper golden tone. The technique stays the same; only your creativity changes.
- Start with this recipe exactly as written so you understand the baseline—then experiment with variations once you've had one successful batch.
- Always use a heavy-bottomed pot with a tight-fitting lid because thin pans create hot spots and loose lids let steam escape unevenly.
- If your tahdig sticks stubbornly, run a thin knife around the edge of the pot before flipping to help release it gently.
 Save
Save Tahdig taught me that some of the most impressive dishes come from patience and technique rather than complicated ingredients. Now when I make this rice, I'm not just feeding people—I'm sharing a small piece of Persian tradition that somehow became part of my own kitchen story.
Recipe FAQs
- → What is tahdig and how is its crust formed?
Tahdig is the crispy, golden crust formed at the bottom of the pot during slow cooking. It develops from a yogurt and saffron layer mixed with rice, which caramelizes in butter and oil.
- → Can I use different ingredients for the tahdig layer?
Yes, tahdig can be made using thinly sliced potatoes or flatbread instead of the yogurt-rice mixture to achieve a crispy base.
- → How do I ensure the rice turns out fluffy and not sticky?
Rinsing the rice until water runs clear and soaking it with salt before parboiling helps remove excess starch, resulting in fluffy grains.
- → What role does saffron play in this dish?
Saffron is steeped in hot water and added to the rice and tahdig layer, providing a subtle floral aroma and vibrant golden color.
- → Can this dish be prepared gluten-free and vegetarian?
Yes, this dish is naturally gluten-free and vegetarian, relying on basmati rice, yogurt, butter, and spices for flavor.
- → How long should the rice rest after cooking?
Letting the rice rest for about 5 minutes off heat allows steam to settle and the tahdig to firm up, making it easier to invert and serve.